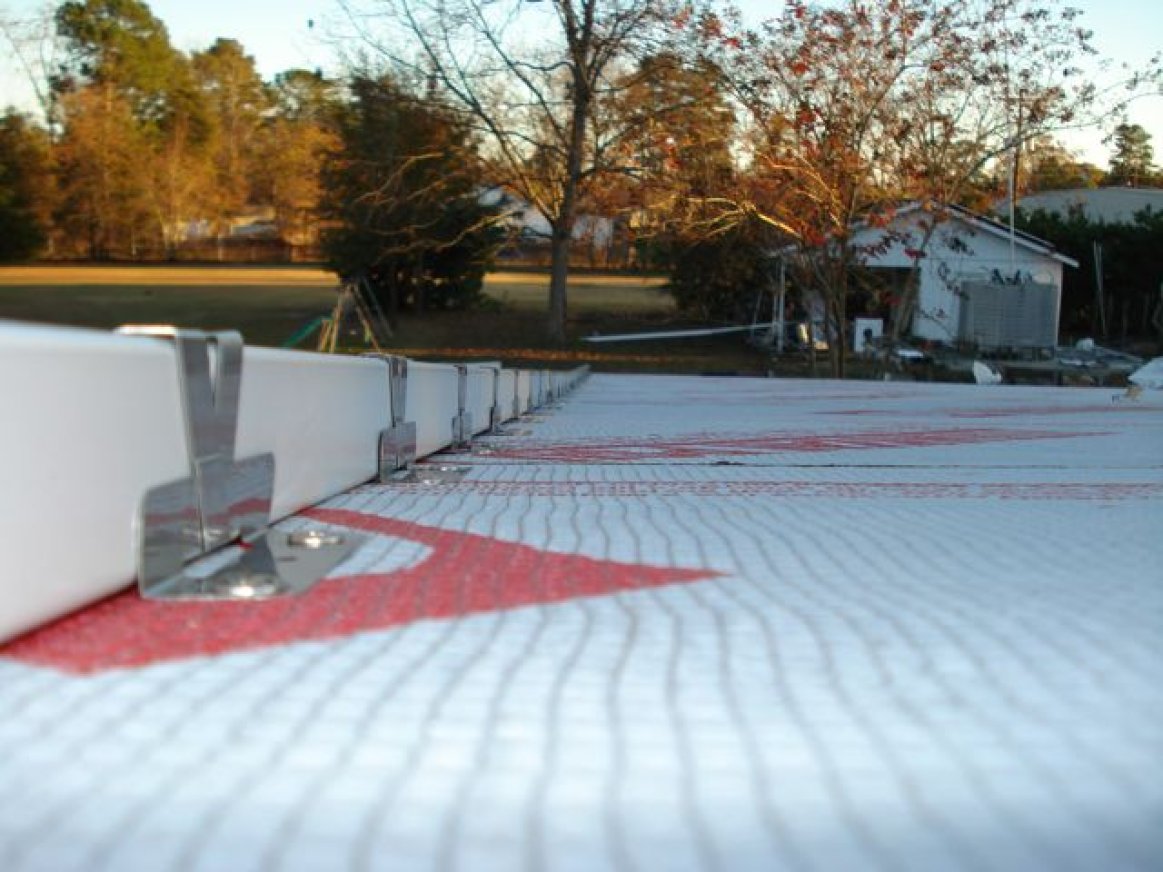


I rebuilt my roof for 150 MPH winds, or for the zombie-near miss tornado. It is 22 gauge steel, white color with 85% reflectance. The seam is H150, 1.5" tall seam, folded over. The hold down clips are spaced every 8" on a plywood deck covered with Titanium Wrap 30.
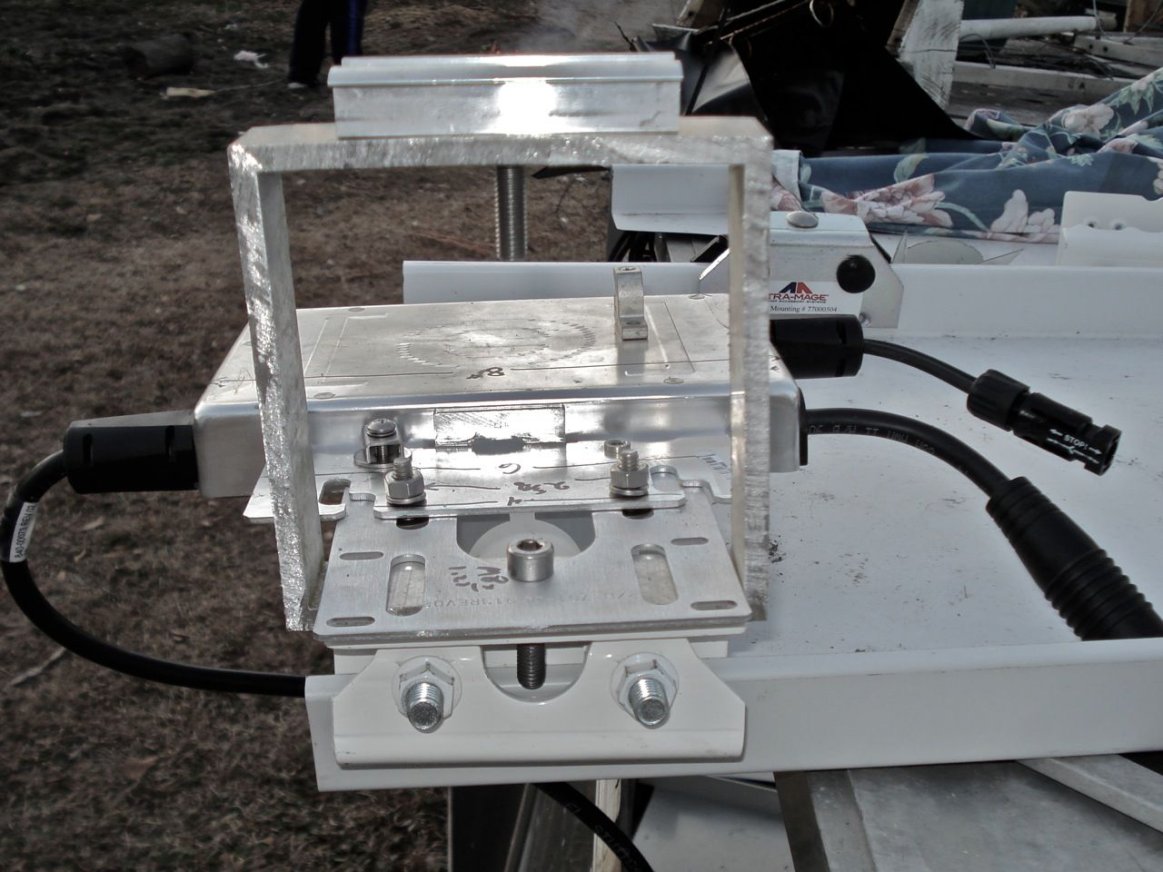
To mount the panels I had to choose between S-5! and Tra-Mage. The Tra-Mage clamps won out as there is considerably more compression holding the clamp to the seam. The company matched the competition for price, and powder-coated the clamps white. My panels will be raised on 6" square aluminum brackets so there will be more air to cool the Enphase inverters and the panels. My first 10 panels are on asphalt, and the power curve is obvious that 3" spacing is too close and hot. Here's the link to my application.
The Tra-Mage clamps will be used to support metal conduit on the roof between the panels. The panels are 18" and so each vertical row of panels must "jump a seam" to work with the size of the panels.
I refuse to put a hole in the roof to bring the AC and lightning surge directly inside the house. Instead, I'm looking for inspiration on how to make a conduit run over the side of the roof look nice, and follow the wall down to the interface box. The lightning rods and main conductor system will take a more direct path to ground, not relying on the conduit to handle that surge.
Comments
Great application Ken!
Could you tell us what kind of solar panels and enphase microinverters you have used for this system?
SolarWorld SW240 and the M190 240V inverters are what I am using. The past year anniversary Jun 8th had the daily average output as 9,250 Wh/day. The orientation is almost West at 258 degrees. Not anything I can do about that. You can see from the solar output graph that cooling is very important, april was the peak, and june/july the Enphase is baking in the heat with the standard asphalt shingles and rail racking system sandwiching the inverters. (yes, I'm an elec engineer). So the output is throttled back, temp limited.
you might ask why do I think $750 is saved when 9250 Wh/day at $.11 is actually $372?
You don't have to work to earn the money! It's a sunk cost. You don't drive to work, you don't pay union dues, or buy new ties, you don't have to get your Enron stock to pay dividends and pay taxes on those dividends, you can golf or fish or be retired instead. So basically I'm saying the 11 cents/kWh rate in SC is less than half the total effort. It's part of the retirement investment. And if our economy tanks, putting panels on your roof is an investment in hardware that won't crash when FDIC does ;)
I agree with you! I think this turned out to be a really great project!
Hey, one more question- The third picture is not clear enough "SentriGuard 22ga standing seam roof with ss clips" - what do I see here? Is that the module and the holding clamp?
you are looking at the standing seam clips that hold the roof panel onto the plywood decking, and the underlayment that weatherproofs the plywood. The S-5! or Tra-Mage PV clamps are holding on over those clips. The clips actually get rolled. I'll attach a photo of the seam. Its obvious that standing seam mounted photo-voltaic panels are a lot stronger than little L-brackets drilled thru shingles. The PSF uplift resistance is much greater.
The panels are up! A full sun October day shows the Enphase inverters are running 10 degrees cooler on the raised panels compared to the standard asphalt shingle installation. At the time of day, both array groups were putting out about 175 watts each.
The stand-off brackets were fabricated from square 6061 aluminum tubing, 1/4 thick.
The standing seam clamps are Tra-Mage, powdercoated white to match the roof.
24 October - full blue sky 1:45 PM high sun!
the inverters mounted on the 5" stand-off brackets are again, 10 degrees C cooler than the panels mounted on a rail over asphalt. Comparing the panels, which are both putting out 160 watts. I will just have to wait until next June when the power output is folded-back due to over heating.
Just a side-by-side view of asphalt shingle mount with rails, vs standing seam with clamps. I put 4 clamps on the bottom and on the top panel, as those are the "leading edge" of the array for wind uplift. "Which looks beefier?"
"can you see why rails block cooling airflow under the panels, thus heating the Enphase inverters?"
"don't the new SolarWorld 240W BLACK FRAME panels look awesome, compared to their last year's model?" The grounding points are incredibly improved too.
TEMPERATURE Differences inside ENPHASE Inverters
Standing Seam Roof with 6" extra stand-off brackets
vs
Asphalt Shingle Installation, typical of the industry
Looking at the temperatures inside the Enphase Inverters, today was a blue sky 90+deg day in South Carolina:
Asphalt shingle mounted panels: 149 F degrees
Standing seam, white roof: 120 F degrees