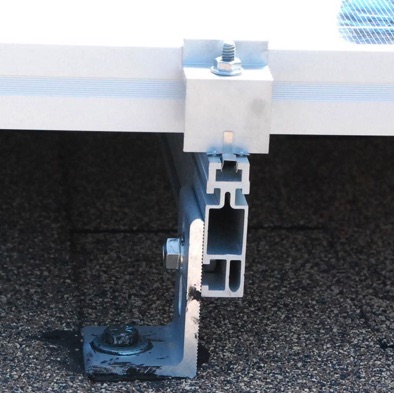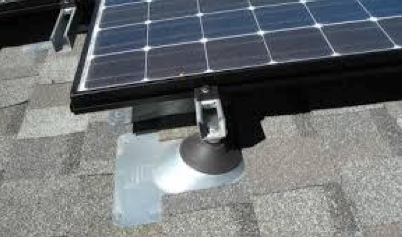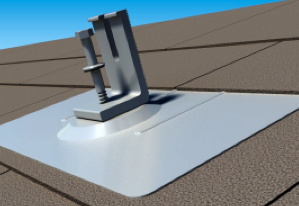
The installation of mounting feet / brackets for PV racking systems on asphalt shingle roofs has come a long way over the years. Changes in installation details, the introduction of proper flashing and subtle changes to bracket / flashing kits have lead to significant savings for installers and system owners alike through reductions in material and labor.
The most significant change is that mounting feet are now, almost all of the time, installed with a flashing. Many moons ago, mounting feet, whether standoffs, L-feet, unistrut or some other type of bracket were directly lagged into the roof structure and then gooped up with roof sealant or caulk. Over the years, this ‘goop’, as I like to call all sticky rooftop sealants, lost it’s original form due to extensive exposure to the environment such as UV radiation, large temperature swings, rain, wind, snow in some cases and many other degrading elements that good ‘ol Mother Nature is capable of throwing at us. The result, a dried up, cracked clump of what once was goop and many potentials for water infiltration issues. Relying on goop to provide waterproofing for a countless number of roof penetrations for more than 20 years seemed like a bad idea.

Then flashings were introduced, what a great idea and then required - an even better idea. By using a flashing for all penetrations, the likelihood of water infiltration reduces significantly. Flashing provides protection to the roof penetrations from exposure to the elements and water runoff. Of course, the system, standoff or mounting foot, flashing and lag must be installed properly. A few moons ago, many of the typical details for installing racking included standoffs with Oatey rubber-boot and aluminum flashings. The process for installing this system after all chalk lining was completed would be to mark the location of the center of the standoff and lag bolts, pre-drill the lag bolt locations, remove any roof nails in the way of the Oatey flashing, mark the cutout for the Oatey flashing, cut the shingle(s) to fit the flashing, fasten the standoff to the roof (the cautious, smart and detailed guys and gals used goop for the lag bolt holes) and then fight with the asphalt shingles, flashing and fixed-in-place standoff to place the flashing. The latter step resulted in many-a-bloody knuckle and torn asphalt shingles requiring additional repair work. Although this process was difficult at times and resulted in frustration, the end result of protected penetrations from the elements was worth the battle. However, there must be a better way of installing racking on asphalt roofs.

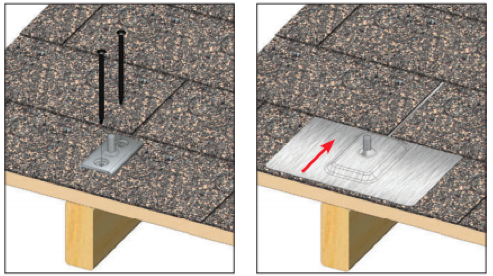
The introduction of mounting feet that employed a simple, single threaded stud sticking up from the roof began the subtle changes to mounting feet / flashing kits. The installation process was similar to the standoff method, see above, except that when it came to installing the flashing at the end, the degree of frustration and number of bloody knuckles was reduced. The single stainless threaded stud, usually ⅜-inch by almost 2-inches high was much easier to work with when compared to a ~ 1-½-inch diameter post by 4-inches high. Still, some thought, there must be a better way of accomplishing this task.

The introduction of the single step, lag bolt-flashing-mounting foot installation method, was a subtle change to the last described mounting foot and flashing kit. It drastically reduced installation time and to some degree the amount of material needed. After the mounting feet layout is established on the roof (using chalk lines, measuring tapes, a hammer and crayons) the flashing kits are quickly installed. The process includes dry-fitting the flashing kit to determine if roofing nails are in the way, removing roofing nails that are in the way, drilling a single pilot hole for the lag bolt (directly on the chalk line), placing a small amount of goop on the pilot hole, placing the flashing kit into place, placing the bracket onto the flashing kit and driving the lag bolt into the rafter securely fastening the mounting foot and flashing in a single step. This process removes the frustration of fighting with the flashing, standoff (or ⅜-inch threaded stud) and shingles resulting in a faster installation, a significant reduction in bloody knuckles and frustration all while providing a protected and water tight roof penetration.

Current methods and materials used to install racking systems for PV arrays on asphalt shingle roofs has come a long way. Although the above is not an all-encompassing discussion of mounting feet and flashing kit options, it is clear that the process by which we install PV on rooftops is getting better. Better for both the installer and the system owner. The installer is presented with an easier, faster and less frustrating process. The homeowner experiences lower costs and more durable, better protected roof penetrations that will endure the wrath of Mother Nature over the lifetime of the PV system.
The only question remaining is, what will be the next subtle change to these systems?